Nov 182007
 

About ten years ago was the first time I had heard about BRINING and Brining a Turkey. As Turkey time is here maybe this is something to try if you haven’t already. Brining is submerging a piece of meat or poultry in a bath of salted water for several hours. Brining ensures the meat is not dried out and tasteless but instead juicy and tender. Timing of brining depends on the size, but for a turkey overnight or up to 24 hours. Make sure that the temperature is cool preferably in a refrigerator if too warm the diffusion process will happen faster and will not be controllable. I hope everyone has Safe Travels and a Happy Thanksgiving.
Salt Ratio

1/4 Cup of Table Salt to 4 Cups of Water

Dissolve the salt with a 1/4 of water (hot) and then add the remaining water.

Brines can also be made Aromatic by adding different flavors to enhance the the overall outcome. Brown Sugar, Garlic, Ginger, Orange Zest, Maple Syrup, Peppercorns, and Red Pepper Flakes

 Posted by at 8:35 pm
Nov 182007
 

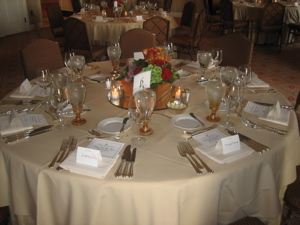
table-settings.jpg

When I was a child, I use to enter the County Fair. One of the categories I would enter in was Table Setting. I remember practicing my table at home and my mother telling me that I had my forks and knives backwards. I proceeded to be the precocious little girl I was sometimes and told her it was my vision and this is how I liked. Needless to say, the judges did not agree with me.

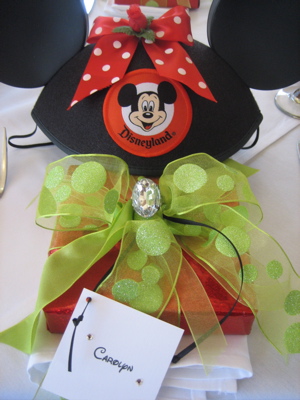
disney-themed-table-arrangement.jpg
Table Setting can be fun and can tie everything together. This is also something that can be done in advance.

With the Holiday Season upon us here are a few helpful Reminders

Left
Forks on the Left and in order of use- farthest left first to use
Napkins on the Left and Left of the Fork or can be in the center where the plate will go.
Butter Plate- is on the top left of the plate with the butter knife across the top of the plate blade towards the user and handle on right. (Remember the trick B & D)

Right
Knives on the Right in order of use- farthest right first to use
Spoons are to the right of knives the right right of the knives.
Glasses – above the knives

Above the Plate
Dessert Spoon and Fork can be placed above the Plate. The Spoon facing left and the Fork facing right.
Place Cards – are either on the napkin if it is in the center or above the place plate.

 Posted by at 8:32 pm
Nov 082007
 

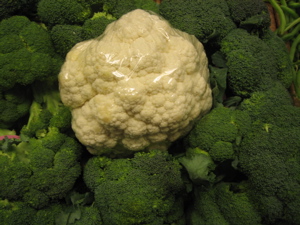
cauliflower-soup.jpg

I did not really eat cauliflower as a child but over the years this vegetable has really intrigued me. Here are a fun few facts about cauliflower. Best quality of cauliflower is in the winter, one serving can provide the daily requirement of vitamin C. It is made up of flowers that began to form but stopped at the bud stage. Flavors that compliment cauliflower: Anchovy, butter, Chervil, Chives, Cream, Curry, Garlic, Ginger, Gruyere Cheese, Lemon, Mustard Seed, Olives, Parmesan Cheese, Thyme, and Turmeric. I of course went with the GARLIC to accompany this soup. The best part is this soup has a creamier consistency but pretty healthy.
Cauliflower Soup

1 Head of Cauliflower
2-3 Tablespoons of Olive Oil
1 Medium Sized Yellow Onion Chopped
1 Russet Potato (Peeled and cut into 1 inch cubes)
1 Bulb of Roasted Garlic
3 Tablespoons of Butter
6 Cups of either Vegetable or Chicken Stock
Garnish with Chopped Chives and Gruyere Cheese
Preheat Oven to 450
Separate the cauliflower and drizzle the Olive Oil over it and place in oven for twenty minutes. In a pot sauté the butter and Chopped Onion for about 5 minutes until they have soften. Add Potato, Garlic Cloves from the bulb, Cauliflower and Stock. Let simmer on medium to low heat for about 40 minutes. Remove from stove and in a blender; blend the soup until smooth and creamy. The color of this soup is very bland that is why it should be garnished with some chopped chives and Gruyere Cheese. Salt and Pepper to taste.
*I Originally did not add enough stock and turns out this could make great baby food.

 Posted by at 6:02 pm
Nov 082007
 

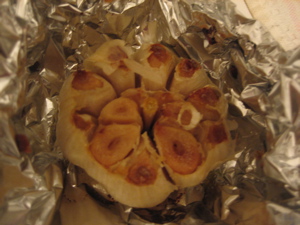
garlic-bulb.jpg

Pretty much anything with Garlic, I love!

Roasted Garlic

1 Garlic Bulb
1 Tablespoon of Olive Oil
Salt and Pepper
Preheat Oven 400
Cut the top of the Garlic Bulb off and drizzle with Olive Oil and Salt and Pepper. Wrap the Garlic in tin foil so that it closes on the cut part. Place in oven for 1 hour.

 Posted by at 5:55 pm
Oct 302007
 

Have you ever had the experience of using an apple that is not good for baking? I can perfectly remember the time years ago, I had made an apple pie and used Fuji Apples. My father had been boasting all evening that I was this great cook/baker and then I was completely mortified when I delivered a juice-less pie for dessert. So next time you are in the market getting ready to buy some apples for baking here are some good ones to use!

-Granny Smith
-Golden Delicious
-McIntosh
-Rome
-Cortland

 Posted by at 5:21 pm
Oct 022007
 

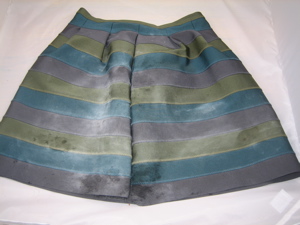
olive-oil-stained-skrt.jpg

I don’t need a reason to get dressed up nor do I care if everyone is in a t-shirt & jeans and I have feathers in my hair. Recently, I was bringing over appetizers’ to a friend’s party. I had them all arranged on a serving tray and was going to hop into a cab. Well halfway between my apartment and my friend’s place, all of the appetizers’ fell on top of me. I was wearing my new baby- (a skirt) and still had two curlers on top of my head. I was now covered in Olive Oil, and the taxi driver kicked me and my friend out of the cab (because I had spilled something.) Completely bewildered, I stood on a street corner…I did think my world had come to an end or was about too (okay, I can be slightly dramatic), my friend who was with me helped me put it into perspective.

What did I learn from this BABY POWDER is the trick to oil stains. I came home and poured an entire bottle practically over the skirt, changed and tried to salvage the remains of my appetizers…

The following weekend my baby (the skirt) was worn, STAIN FREE. Click here for Red Wine Stains!

 Posted by at 5:34 pm
Aug 022007
 

Busy, Busy, Busy is how I feel a lot of the time. I guess that is why NYC has the nickname “the city that never sleeps.”  Now I realize sometimes there is no time to cook or even make a restaurant reservation, so here is the solution.  A good friend of mine is starting this business called SUNDAY where you can have a personnel assistant for only $29 a month allowing you 30 requests.  They can provide anything from reservations, travel arrangements, wake-up calls with the weather as well as offering delivery services in the NYC area. (Sunday services are not limited to NYC and have customers throughout the US).  You can even have them look up recipes for you and email them to your Blackberry while you are on the way to the store!  If you can request it they can most likely figure a way to answer it.  So if you are one of those people that don’t even have enough time or don’t know where to begin in sending flowers, check Sunday out at http://www.asksunday.com

I was reading the New York Times and came across this great article by Mark Bittman, Summer Express: 101 Simple Meals Ready in 10 Minutes or Less.  I definitely think worth checking out. I lately find myself making omelets.  It is funny, I have a fully stocked pantry but nothing that is readily eatable so I am always snacking on the most random items.
Here are my Top 10 from the List:
1. Put three pounds of washed mussels in a pot with a half a cup of white wine, garlic cloves, basil leaves and chopped tomatoes. Steam until mussels open. Serve with bread.
2. Cut eggplant into half-inch slices. Broil with lots olive oil, turning once, until tender and browned. Top with crumbles goat or feta cheese and broil another 20 seconds
3. Upscale tuna salad: good canned tuna (packed in olive oil), capers, dill or parsley, lemon juice but no mayo. Use to stuff a tomato or two.
4. Frisee aux lardons: Cook chunks of bacon in skillet. Meanwhile, make six-minute or poached eggs and a frisee salad. Put eggs on top of salad along with bacon; deglaze pan with sherry vinegar and pour pan juices over all
5. Taco Salad: Toss together greens, chopped tomato, chopped red onion, sliced avocado, a small can of black beans and kernels from a couple of ears of corn. Toss with crumbled tortilla chips and grated cheese. Dress with olive oil, lime and chopped cilantro leaves.
6. Raita to the rescue: Broil any Fish. Serve with a sauce of drained yogurt mixed with chopped cucumber, minced onion and cayenne.
7. Grill or sauté Italian sausage and serve over store-bought hummus, with lemon wedges.
8. Miso steak: Coat beef tenderloin steaks (filet mignon) with a blend of miso and chili paste thinned with sake or white wine. Grill or broil about five minutes
9. Boil- and-eat shrimp, cooked in water with old bay seasoning or a mixture of thyme, garlic, paprika, chopped onion, celery, chili, salt and pepper
10. So-called Fettuccine Alfredo: Heat several tablespoons of butter and about a cup of cream in a large skillet just until the cream starts to simmer. Add slightly undercooked fresh pasta to the skillet, along with plenty of grated Parmesan. Cook over low heat, tossing, until pasta is tender and hot.

101_simple_meals_in_10_minutes_or_less.pdf

 Posted by at 5:16 pm
Jul 262007
 

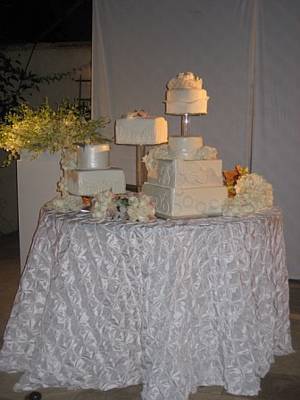
The day finally came and my sister’s wedding has come and gone. I am still exhausted from it all as the festivities went on for days. But everything came off beautifully due to countless hours of work and coordination done by my mother and sister. I found it difficult to choose on what to write about as there were days of parties. So for now I will just stick to the actually wedding day.

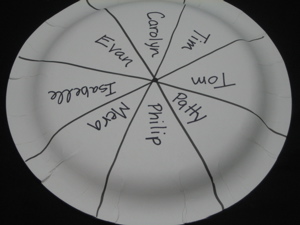
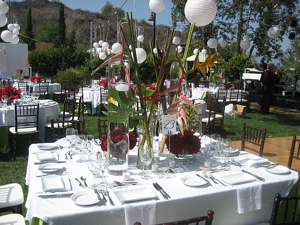
paper-plate-with-names.jpgwedding-table.jpg

I have to give kudos to my sister and her now husband on their table arrangements. A daunting task when you are not only placing people at a table but also seating them.   Here is one trick that they were given in this process. Take a paper plate and cut it into pie slices. Have the number of slices match the number of people at the table.  Then put the invites names on the slices. This makes it easy to move people around and visually see it, before actually writing it down.
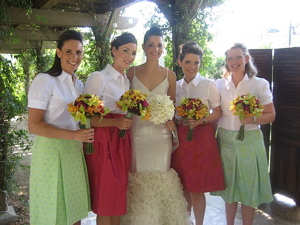
happy-couple.jpgbridesmaid.jpg the-wedding-cake.jpgfather-daughter-dance.jpg mom-and-bridesmaid.jpg

 Posted by at 6:28 pm
Jun 282007
 

roasted-peppers-1.jpg rpasted-peppers-2.jpg

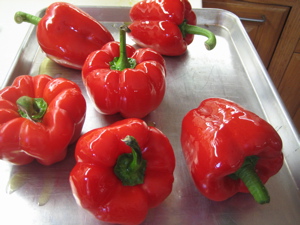
How to roast a pepper, is a lot simpler than one might imagine. Whenever a recipe calls for something to be skinned, my initial reaction is EEK! That will require a lot more work, but that is not always necessarily true. There are so many fun recipes that work with roasted peppers or just adding them to any sandwich or salad. So here is how I roast my peppers.

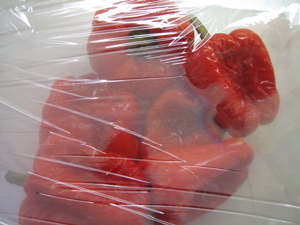
Brush each pepper with a little olive oil, place on a baking sheet and bake in oven at 400 degrees for about 30 minutes. Remove from the oven and either place them in a brown paper bag or in a bowl covered with plastic wrap. Let them cool, it is much easier to handle when they have cooled down (at least ten minutes). The skins will just peel right off and remove the center seeds. Now they are ready to do what you please with! They will keep for about 1 week.

Definitely a great color to use for next week on the 4th of July!

 Posted by at 5:41 pm
May 132007
 

tulips.jpg

Today is Mother’s Day one of the most popular times of year to buy flowers. Tulip season, is also underway. So here is a helpful tip for keeping your tulips looking fresh. If they start to fall over add a little bit of vodka to water and they will perk back up. Thank you Christina for this tip.
Happy Mother’s Day to all Mothers and to mine- I love you!

 Posted by at 7:17 pm