Dec 192007
 

This is a little out of the normal entry but has to do with the home. Last Friday evening I came home from work to find my apartment had been completely ransacked. Definitely, an unsettling feeling to know a perfect stranger had broken into my apartment and torn through all of my personal items.

I try to always be positive and view the glass as half full versus half empty. It was horrible but could have been worse…but for years I thought about getting rental insurance – thought it would be expensive and take a long time to get. I was wrong it is quite the opposite. About 2 months ago I finally did it, very simple, not expensive and definitely gives you a peace of mind. When I was at the police station I told a friend “well, at least I have rental insurance” who responded with –“You do, I don’t anyone who actually signs up for that.”

Subsequently, I have talked to many people saying they have been meaning to sign up for it or others that do have it and again the peace of mind it gives. The coverage spans items outside the home too when traveling. Here are a few places to go if you don’t have rental insurance– it is quick, easy and totally worth it.

Travelers

All State

Hartford

AIG

State Farm

 Posted by at 8:24 am
Dec 122007
 

Biscotti are something I don’t often think about making but really should. I thought these were perfect for the holiday with red of the cranberry and green of the pistachio. But really you could inter change this recipe with which ever dried fruit or nut you prefer. The best part is that these will last for about 2 weeks in an air tight container.

Biscotti

1 stick of unsalted butter
3/4 Cup of Sugar
Zest from one large Orange
1 Tablespoon of Orange Juice
1 Teaspoon of Vanilla
2 Eggs
2 Cups of Flour
1 Teaspoons of Baking Powder
A Pinch of Salt
1 Cup of Dried Cranberries
1 Cup of Pistachios

5 Ounces of White Chocolate (optional)

Preheat Oven to 325

In a bowl beat together (on medium to high speed) Butter, Sugar, Zest, Juice, and Vanilla for about 2 minutes. Beat in Eggs one at a time. Gradually add in the Flour, Baking Soda, and Salt. Followed by folding in the Cranberries and Pistachios. Mix this together eventually the dough will be come less sticky and refrigerate for at least 30 minutes.
Separate the dough into three pieces and place on floured working surface and form a log that is about 3″ x 10″ inches. Place each log on a baking sheet and bake for about 35 minutes. Take out of oven and let cool on a rack for about 10 minutes and then make one inch slices. Return to the oven and bake for about 15 to 20 more minutes until golden.
In a double Boiler melt the white chocolate and either dip half the biscotti into the white chocolate or brush one side of the biscotti with the chocolate.

 Posted by at 7:11 am
Dec 022007
 

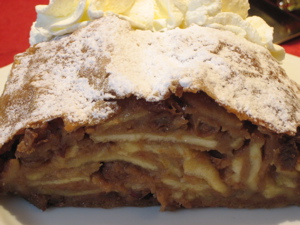
apple-strudel.jpg apple-strudel-2.jpg

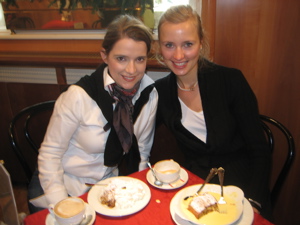
This past Thanksgiving I did not spend with my family and instead visited a friend in Vienna. This could definitely become one of my favorite cities. A city all about eating chocolates and cakes, how could I not instantaneously become enamored? I had an agenda of different foods I wanted to try while I was there and classic Apple Strudel was on the top of my list. Another treat that I enjoyed were the Christmas Markets and Spiced Wine.
Now this recipe I received from Cafe at the Summer Palace.

Strudel
1 Cup plus 2 Tablespoons of Flour
1 Egg
1/2 Teaspoon of Salt
1/3 Cup plus 2 Tablespoons of Lukewarm Water
5 Teaspoons of Vegetable Oil

Mix all ingredients to a soft dough and knead it until it looses from hands and table.
Tip: Form it into a ball and let it res in vegetable oil for 30 minutes. Put the dough on a flour covered linen cloth and roll it in a rectangular shape. Continue to stretch the dough out with the back of your hands until it is wafer-thin.

Filling
1/2 Cup of Bread crumbs
3 Tablespoons of Butter
2/3 Cup of Sugar
2 Teaspoons of Cinnamon
3/4 Cup of Raisins
2 Teaspoons of Lemon Juices
2 1/2 Pounds of Apples peeled, cored, and thinly sliced
1 Tablespoons of Rum.
Pre Heat Oven 375
Heat the Butter in a pan, add the breadcrumbs and roast them until they take on a golden brown shine. In a bowl add the bread crumbs with the remaining ingredients and mix them all together .
Put the filling along the extended layer of the dough. Roll it up carefully with the cloth. Put the strudel onto a buttered baking tray and bake it in the oven at until it takes on a golden brown shine about 35-45 minutes. Tip: Put butter on the Strudel as soon as you take it out of the oven.

Serve warm with either, Whipped Cream, Vanilla Ice Cream, or a Vanilla Sauce.

 Posted by at 6:56 pm
Nov 182007
 

About ten years ago was the first time I had heard about BRINING and Brining a Turkey. As Turkey time is here maybe this is something to try if you haven’t already. Brining is submerging a piece of meat or poultry in a bath of salted water for several hours. Brining ensures the meat is not dried out and tasteless but instead juicy and tender. Timing of brining depends on the size, but for a turkey overnight or up to 24 hours. Make sure that the temperature is cool preferably in a refrigerator if too warm the diffusion process will happen faster and will not be controllable. I hope everyone has Safe Travels and a Happy Thanksgiving.
Salt Ratio

1/4 Cup of Table Salt to 4 Cups of Water

Dissolve the salt with a 1/4 of water (hot) and then add the remaining water.

Brines can also be made Aromatic by adding different flavors to enhance the the overall outcome. Brown Sugar, Garlic, Ginger, Orange Zest, Maple Syrup, Peppercorns, and Red Pepper Flakes

 Posted by at 8:35 pm
Nov 182007
 

table-settings.jpg

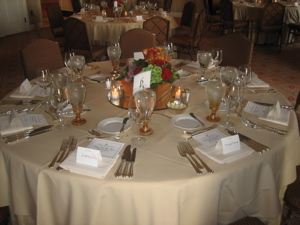
When I was a child, I use to enter the County Fair. One of the categories I would enter in was Table Setting. I remember practicing my table at home and my mother telling me that I had my forks and knives backwards. I proceeded to be the precocious little girl I was sometimes and told her it was my vision and this is how I liked. Needless to say, the judges did not agree with me.

disney-themed-table-arrangement.jpg
Table Setting can be fun and can tie everything together. This is also something that can be done in advance.

With the Holiday Season upon us here are a few helpful Reminders

Left
Forks on the Left and in order of use- farthest left first to use
Napkins on the Left and Left of the Fork or can be in the center where the plate will go.
Butter Plate- is on the top left of the plate with the butter knife across the top of the plate blade towards the user and handle on right. (Remember the trick B & D)

Right
Knives on the Right in order of use- farthest right first to use
Spoons are to the right of knives the right right of the knives.
Glasses – above the knives

Above the Plate
Dessert Spoon and Fork can be placed above the Plate. The Spoon facing left and the Fork facing right.
Place Cards – are either on the napkin if it is in the center or above the place plate.

 Posted by at 8:32 pm
Nov 082007
 

cauliflower-soup.jpg

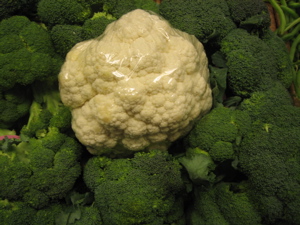
I did not really eat cauliflower as a child but over the years this vegetable has really intrigued me. Here are a fun few facts about cauliflower. Best quality of cauliflower is in the winter, one serving can provide the daily requirement of vitamin C. It is made up of flowers that began to form but stopped at the bud stage. Flavors that compliment cauliflower: Anchovy, butter, Chervil, Chives, Cream, Curry, Garlic, Ginger, Gruyere Cheese, Lemon, Mustard Seed, Olives, Parmesan Cheese, Thyme, and Turmeric. I of course went with the GARLIC to accompany this soup. The best part is this soup has a creamier consistency but pretty healthy.
Cauliflower Soup

1 Head of Cauliflower
2-3 Tablespoons of Olive Oil
1 Medium Sized Yellow Onion Chopped
1 Russet Potato (Peeled and cut into 1 inch cubes)
1 Bulb of Roasted Garlic
3 Tablespoons of Butter
6 Cups of either Vegetable or Chicken Stock
Garnish with Chopped Chives and Gruyere Cheese
Preheat Oven to 450
Separate the cauliflower and drizzle the Olive Oil over it and place in oven for twenty minutes. In a pot sauté the butter and Chopped Onion for about 5 minutes until they have soften. Add Potato, Garlic Cloves from the bulb, Cauliflower and Stock. Let simmer on medium to low heat for about 40 minutes. Remove from stove and in a blender; blend the soup until smooth and creamy. The color of this soup is very bland that is why it should be garnished with some chopped chives and Gruyere Cheese. Salt and Pepper to taste.
*I Originally did not add enough stock and turns out this could make great baby food.

 Posted by at 6:02 pm
Nov 082007
 

garlic-bulb.jpg

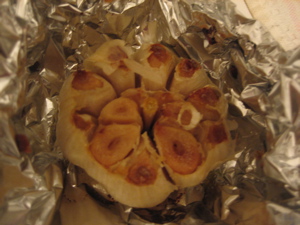
Pretty much anything with Garlic, I love!

Roasted Garlic

1 Garlic Bulb
1 Tablespoon of Olive Oil
Salt and Pepper
Preheat Oven 400
Cut the top of the Garlic Bulb off and drizzle with Olive Oil and Salt and Pepper. Wrap the Garlic in tin foil so that it closes on the cut part. Place in oven for 1 hour.

 Posted by at 5:55 pm
Oct 302007
 

My favorite time of the month is when Gourmet Magazine arrives in my mailbox. Last weekend I was inspired by the Vegetable Stew served in a baked Pumpkin in the November Issue.  When I am inspired it usually means a dinner is coming soon.  I had no idea what I was taking on exactly but definitely a large endeavor for my tiny little space.
If you try this stew I recommend making the stoock in advance and not making the entire stew in one day. As I was happy with the Vegetable Stew, I was most enamored by the Baked Apples and Calvados Ice Cream I had made for dessert.  What was even more amazing about them was how simple and easy they were it was 6pm, people were arriving at 7, and I curlers in my hair and still had not started the Baked Apples. Because my beloved stew had taken so long to make!!

Baked Apples

8 Apples (I used Cortland)
1 Cup Light Brown Sugar
2/3 Cup Raisins
1/3 Cup Dried Apricot
1/3 Cup Chopped Pecans
1 Tablespoons of Flour
5 tablespoons of Melted butter
¾ Cup Sparkling Apple Cider
1 teaspoon of vanilla
¼ Teaspoon of All Spice
½ Teaspoon of Cinnamon

Preheat 400

Using a melon Baller take out the core of each apple.
In a separate bowl mix together sugar, raisins, apricots, pecans, flour, cinnamon, and all spice. Add three table spoons of butter and vanilla. Stuff each of the apples with the sugar mixture and brush the remaining butter around the apples. Right before baking top off by pouring apple cider over the top of the apples.
Bake for 1 hour or until apples have softened.

 Posted by at 5:32 pm
Oct 302007
 

Have you ever had the experience of using an apple that is not good for baking? I can perfectly remember the time years ago, I had made an apple pie and used Fuji Apples. My father had been boasting all evening that I was this great cook/baker and then I was completely mortified when I delivered a juice-less pie for dessert. So next time you are in the market getting ready to buy some apples for baking here are some good ones to use!

-Granny Smith
-Golden Delicious
-McIntosh
-Rome
-Cortland

 Posted by at 5:21 pm
Oct 302007
 

ice-cream-machine.jpg

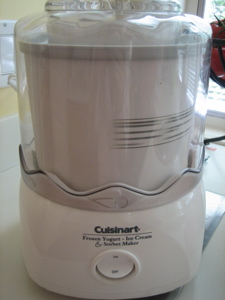
I have not talked about my ice cream maker. It is one of my FAVORITE  tools in the kitchen and one of my FAVORITE gifts to give. I got this idea to make calvados ice cream from always seeing liquored flavored whipped creams and thought why not do the same with ice cream but make and apple brandy flavor that could go with an apple dessert.
I have a tendency to try and rush things along when I am cooking – with custards the base of the ice cream…Not a good idea. It will most likely lead to a curdled useless custard, which is what I did the first time.

Calvados Ice Cream
2 Cups of Heavy Cream
1 ½ Cup of Milk
3 Egg Yolks
½ Cup of Sugar
1 Teaspoon of Corn Starch
1 Teaspoon of Vanilla
1-2 Tablespoon of Calvados Brandy

In a pot bring to a boil the Cream, Milk, and Vanilla. In a separate bowl beat the egg Yolks, Sugar, and Corn Starch. Pour ½ Cup of the boiling Cream into the egg mixture to temper,  it so that it does not curdle. Proceed this way until all of the Cream has been well combined.  Return the mixture to the stove and heat on low to medium heat- stirring until custard starts to bubble. To know it is done test is with a wooden spoon. If you dip the spoon and then make a line in the back of the spoon with your finger and the line holds shape then it is done. At this point add the 1 the Calvados. Remove and place into a separate bowl and refrigerate. Once cooled completely pour into Ice- Cream Maker.

 Posted by at 5:12 pm